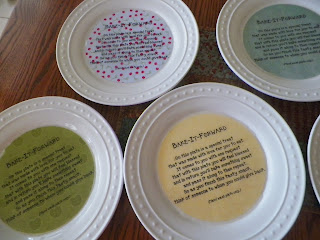
I made these plates a couple of months ago for everyone on the Relief Society Board. Our ward is fairly new, and we decided the theme of our board meeting would be "Connections". Everyone is so nice, but none of us really know each other very well at all. I was amazed at the board meeting that some people who have lived here longer than me didn't even know everyone there. One of our counselors, who is a professor at U.T. gave a wonderful talk about experiences she has had making connections with various people in different places she has lived. She said the difference in a true connection with people is serving them.
One of the ladies attending asked me on Sunday something about the handouts she'd be getting. PANIC! No handouts were planned and we hadn't planned to give them anything at all. It was going to be very simple. I decided to start looking around to see if I could find something EASY. Well, these Bake-It-Forward plates, weren't the easiest thing ever, especially when you have to make 16 in a hurry, but they turned out fun.
So the idea of the plates is to bake something, give it to someone you don't know well (hopefully within the ward since we are trying to make "Connections" that way, but we know it won't stay forever in the ward). Then they'll do the same for someone else.
A few notes:
~I definitely didn't love the poem. I would have come up with something a little better if I had had some time, but I only had a day, and no time to waste.
~I would advise using double-sided background paper, such as the kind Stampin' Up! carries. I think the lighter weight stuff that just had a design on one side would be a disaster to work with. I had a hard time keeping the bubbles out as it was with the heavier stuff. (I still got a few bubbles.)
~The Envirotex Lite stuff is great, but does take a ton of drying time. More that what the girl who wrote the blog says. We couldn't even place anything on the plates to give to the ladies at the meeting. They were still too sticky. Give at least 3 days drying time.
~In the blog, the girl says to use a long lighter to get the bubbles out (and you DO have to babysit it for a while, because the bubbles do keep popping up). In the instructions however, it says to use an acetylene torch. Not many people will have one. My husband happens to, so we used it and it is MUCH faster than the lighter, but a lighter will work. You just have to practically touch the resin to get rid of the bubbles.
I don't want it to sound like they were a royal pain to do! :) I just wish I would have had a few more days to work on them! Everyone absolutely loved them, so that was fun!
I don't want it to sound like they were a royal pain to do! :) I just wish I would have had a few more days to work on them! Everyone absolutely loved them, so that was fun!


No comments:
Post a Comment